Tuesday, April 28, 2015

Documenting Goals

Aztec Calendar
created for a Social Studies project in 6th grade
I am a strong believer in documenting my goals. I have a notebook that I carry with me that contains different goals that I hope to one day accomplish. My new goal is to document the next project I start. I have a history of starting projects, that don't have instructions attached to them, and not taking a single photo of the process. The pictures on this post include some of my past projects that I haven't documented, or made instructions for. I'm excited for the next project I have in mind for Genius Hour. Since none of the projects I'm interested in doing have any type of instructions I want to be the first to make step by step instructions of how to make it.


Typewriter
created for a Social Studies project in 6th grade
In the future, I want to start making videos and blog post of instructions of how to make projects I've made in the past. Throughout the week I am going to make sure that I take pictures of the process of making my final product. If anyone is interested in knowing how to make any of the projects in the photographs - for school or otherwise - please leave a comment. If people actually care about knowing how to make models like the ones I've taken a picture of for my portfolio I will start making instructions and videos sooner.


Scroll
created for a Social Studies project in 6th grade

I can't wait until I start on my next project. The newest thing I've learned for this process is that I need to respect the creative process. Creativity involves problem solving, using objects and ideas that don't seem the relative in the slightest, and feeling comfortable to change your mind. I've gone from doing projects to finding the desire to document how I'm making them. Years of just doing art for fun have actually started to turn into something much more.

Saturday, April 25, 2015

Taking a Chance

Everyone has a bad habit and today I've realized that I have a new bad habit. For months I've been looking for ideas and instructions online of how to do paper crafts. I've googled, I've browsed Pinterest, I've watched Youtube videos and I have made some products. Today my mom pointed out something to me that I hadn't noticed about my Genius Hour process this year. 

This year I put myself in a box. I put all of my creativity in a small cramped box. I've followed instructions on how to build objects and I've enjoyed it, but it doesn't give me the spark of happiness that it usually does. I've made different things out of paper before, but Genius Hour is about new learning. After learning about 3D origami I was ready to try making something. I've made a 3D origami panda and I'm happy with it, but I'm not satisfied. 

I want to make something exciting and big. There's nothing wrong with instructions, but my new goal is to make something that I've created without directions. I'll use references to photographs, most likely. I'm not sure what I want to make next, but I'm not going to restrict myself. For the past few weeks I've looked at different pictures of paper craft projects. If a project looked like I wouldn't have time to make it I just ignored it.

I'm going to take a chance and not worry about the length of time my next project will take. I'm excited and I feel that spark in my heart to make something new again. To anyone who is participating in a project or in Genius Hour : Don't be afraid to take a chance. 


Tuesday, April 21, 2015

Types of Origami

I've found out some cool information today.There are different forms of origami! I've found even more possibilities to the art of paper folding.


Krigami

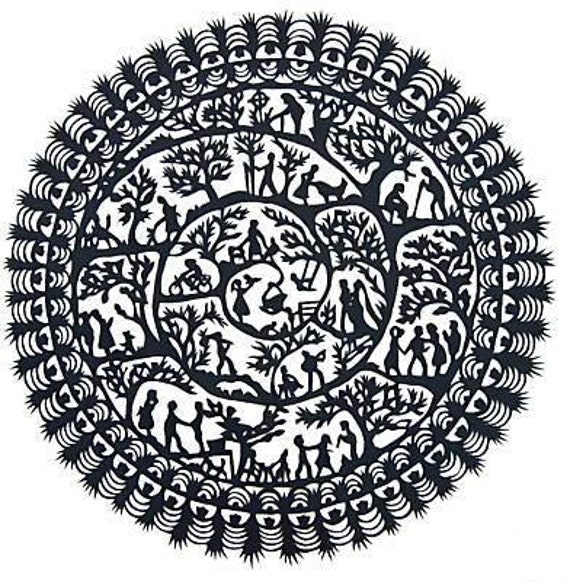
Krigami is a form of paper art that involves folding and cutting. Krigami comes from the Japanese language ("kiru" = to cut, "kami" = paper). Hopefully, I'll find the time to look up instructions to make something in this style.


Candy Wrapper Origami


I've tried doing something like this before,but I never knew there was a name for it. Candy wrapper origami is pretty self explanatory. Candy wrappers can be used to make different objects such as butterflies or flowers. There have even been people who create clothing out of candy wrappers.


Wet Folding Origami


Wet folding origami is a modern form of origami created by Akira Yoshizawa. This involves wetting the paper being used before folding to create a textured effect. This form of origami takes lots of practice but the effect of the technique is worth it.


Action Origami


Action origami is one of the coolest paper craft projects I've heard of. Action origami can be as simple as the 400 year old paper airplane or the cootie catcher (one of my favorites) that tells fortunes. Action origami is the process of folding paper in a way that the final product is able to move in action.


There are many different forms of origami and an endless possibility of creations that can be made. I've made a promise to myself today. I am either going to find time or make time to start, if not finish, a project this week. I am a high school student that can meet a deadline for my homework that's due but can't make a plan to do somjething I love to do and follow through with it. Even if I make something small I am going to give myself time to participate in something that makes me happy. i can't wait to explore the world of origami.


Tuesday, April 14, 2015

A Look Back in Time


The first form of paper was papyrus, a dried and compressed form of sliced sections of the flower stem of the papyrus flower, used for drawing and writing. Papyrus originated in Egypt in 2400 B. C. The creation of paper was in China in 105 A. D. by Ts' ai-Lun from Lei-yank, China

During the fourth century, the Chinese started cutting paper from ornamental purposes and embroidery patterns. Although, paper crafts were originally done by the royal entourage later on paper crafts became a folk art. Paper crafts were also use for practical purposes rather than just aesthetic reasons.

Years pass and the art of paper crafts spreads to the Middle East at the end of the seventh century and the beginning of the eighth century. At the end of the fifteenth century the country of Turkey had a guild created specifically for the purpose of paper crafting.  In the year of 1582 an observer reported seeing a guild member display of a garden entirely made of cut paper flower for the ruler of that time.

During the seventeenth century paper crafts reached European countries, such as : Italy, Germany, Switzerland, and Holland. By the end of the seventeenth century Germany had a popular folk art called Swiss Scherenschnitte, or "scissor cuts". Scherenschnitte is now considered one of the finest paper crafts in the word.


In the 1990s 3D origami became popularized. 300 Illegal Chinese immigrants aboard the ship "The Golden Venture" were caught on their $5,000 paid trip to America. While in prison the immigrants made beautiful paper sculptures using magazine pages and toilet paper. The pieces they created are known as "Freedom Birds". About 30 of the immigrants from the Gold Venture live in the United States today.

Saturday, April 11, 2015

3D Origami Base

After I learned how to make 3D origami modules tought I was ready to start building objects. Through research, I found out that every 3D origami object has a base. Although, the number of modules and number of rows are determined by what object your building, basics of building the base are pretty easy to understand.

The link below is the website I used to learn how to make a 3D origami base.

http://3dorigamiart.com/about-2/

The 3D Origami Panda

I found the picture above while I was searching through pictures on Pinterest. This picture had the most in depth instructions I could find, so I thought it was a good idea for this to be my first 3D origami piece. I thought the panda was super cute. It wouldn't be until much later that I figured out I needed more than 400 modules to complete this piece. Considering I folded construction paper into 16 sections per sheet of paper it took a lot of paper to build this.


The image above are the modules that I counted out to complete the base of the panda. I also made the decision to put glue on each module before putting it together with another module. Although, this was my first time make anything with 3D origami pieces after reading a post on Pinterest about someone accidentally destroying their 3D origami swan while they were moving as a result of not gluing the modules together I decided it might be a good idea to glue the modules together.


The picture to the left is a picture of my upside down base and the beginning of the panda's body. The picture to the right is only two rows away from being the panda's entire body. Fortunately, I didn't have any mistakes that ruined the panda's body. If I glued one module in the wrong pace it would've thrown the entire row off and possibly the row below it.


The picture above is my panda! I worked on the panda five separate days since it takes five hours to complete. The glue combined with how close the modules get to each other has made this panda very sturdy. It is about seven inches tall and I am very proud of how it turned out.


Wednesday, April 8, 2015

Failure #1

The image above is an origami  Koi fish. This origami Koi looked interesting enough for me to attempt to make it. I'm happy to say I watched a four minute video over and over to try to make this. Sadly, with no written instructions the video I watched only became frustrating. This was my first failure for Genius Hour this year. I hope that I will try this again soon to see if I can succeed at making this.

This Koi fish was my first failure and it will certainly not be my last over the next few weeks.I have recently tried a different project that did not end as well as I'd hoped. The beauty in this process is that I know I won't succeed at everything I try, but I can say what I did wrong so someone else can learn from my mistake a do better.

As soon as I try this again I will make sure to post how it goes and what websites or videos I use to accomplish it. I wish they best of luck to anyone who tries to make one of these origami Koi fish. I would love it if anyone who has succeed in making an origami Koi fish would please comment any tips for making one.