Monday, May 11, 2015

Citations


These are the resources I have used throughout my Genius Hour research. Just in case anyone is interested in any of these websites I attched the links to each website by the corresponding MLA format citation.
  • "3D Origami Art." 3D Origami Art. N.p., n.d. Web. 09 May 2015. (To follow the link click HERE)

  • "3D Origami for BEGINNERS." YouTube. N.p., n.d. Web. 09 May 2015.  (To follow the link click HERE)

  • "A Brief History of Paper." Crafts RSS. N.p., 31 May 2013. Web. 09 May 2015. (To follow the link click HERE)

  • "DIY - Bird Cage Lanterns - The Bride's Cafe." DIY - Bird Cage Lanterns - The Bride's Cafe. N.p., n.d. Web. 09 May 2015. (To follow the link click  HERE)

  • "Types of Origami." Types of Origami. N.p., n.d. Web. 09 May 2015. (To follow the link click HERE)

  • "好可爱的折纸熊猫~快来学习折一个吧." 好可爱的折......_来自Florence_11的图片分享-堆糖. N.p., n.d. Web. 09 May 2015. (To follow the link click  HERE)

  • "The History Of Paper And Paper Crafts." Papersave. N.p., 21 Mar. 2013. Web. 09 May 2015. (To follow the link click HERE)

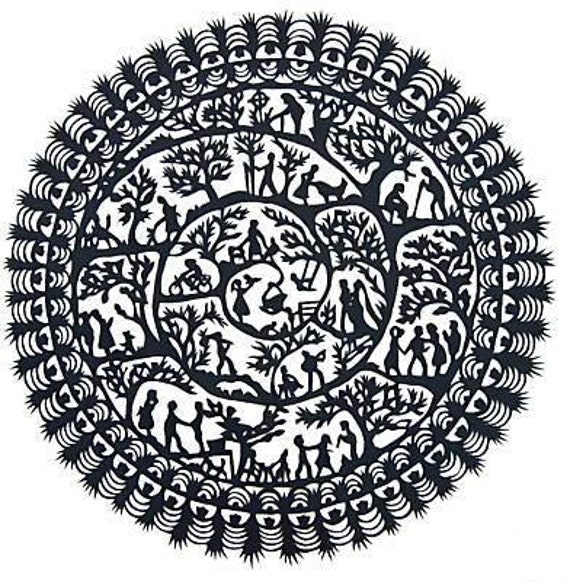
  • “Kirigami Is an Art Form Where Paper Is Folded & Cut to Create Beautiful Designs." Kirigami Is an Art Form Where Paper Is Folded & Cut to Create Beautiful Designs. N.p., n.d. Web. 09 May 2015. (To follow the link click HERE)

  • "Origami Maniacs: What Is 3D Origami?" Origami Maniacs: What Is 3D Origami? N.p., n.d. Web. 09 May 2015(To follow the link click HERE)

2000 Paper Cranes


I just found out a interesting fact about paper cranes. I read about an ancient Japanese legend that says that anyone who folds 1000 paper cranes will be granted a wish. Many people fold 1000 paper cranes for weddings, hope, and good luck. The video shows how much an act of one person can a difference. Artist, and creator of the video, Jeffery Brown wrote:


"This is an art project I've created to memorialize Sadako Sasaki.

Contained within the fragile wings of these 2000 paper cranes is the portrait of Sadako Sasaki. A child victim of leukemia from the atomic bombings of Hiroshima, Sadako folded paper cranes as a means to become well again. She eventually lost her battle from a disease caused by a war that was no fault of her own. Drawing from her dedication to overcome adversity and born from the hope to memorialize and inspire, each grayscale crane serves to allow Sadako's story of perseverance and optimism to live on. A single origami crane stands true as a universal symbol of peace, but when folded and grouped into larger quantities, their overwhelming inspiration seems to flourish.


Although hatred and greed abundantly affect much of our world, it seems that compassion and empathy are spread thin. These emotions, be it love or hate, are universal, and not exclusive to any one creed; their potential lives inside everyone. This message is echoed in the fact that a folded origami crane can blossom from any hand. It is hoped that the solemn stare of the girl that materializes from within the careful arrangement of folded paper helps the viewer to reflect on the potential that lives inside themselves."

Jeffery Brown's art piece is currently being displayed in Hiroshima, Japan after almost seven years of dedication. It is held in a permanent display pieces in the Honkawa Kindergarten in Hiroshima, which is the closest kindergarten to the Peace Memorial Park. Jeffery Brown hopes to inspire a new generation.

Saturday, May 9, 2015

In the End


This is the last blog post I am required to do for my English 1 class. It has been a wonderful six weeks of having the freedom to research the topic that I chose. I present to my class on Tuesday, May 12, which happens to be next week. I plan to continue exploring my leading question : What aesthetic creations can be made out of paper? I also plan to continue blogging even though Genius Hour is about to end. Everyone in English 1 at my school is required to answer five simple questions for their last blog entry.


1. What was your favorite part of the topic you chose?
My favorite part of learning what objects can be made out of paper was how broad the topic was. I loved how many things I could research and make within this one driving question. I had the option of working with copier paper, rice paper, wax paper, cardboard, poster board, tissue paper, and more.

2. What was your least favorite part of the topic you chose?
My least favorite aspect of my topic was how much time it took to make a product. I love to make things, but with the hectic schedule I have at school combined with how tired I am by the weekend makes it difficult to make more products for Genius Hour.

3. What do you like best about Genius Hour research?
My favorite thing about Genius Hour research was learning about the history behind paper. I have a deep love for research and history, so I also find it exciting knowing how inventions we have today were made.

4. What do you like least about Genius Hour research?
Participating in Genius Hour is always a joy, but there are many problems that happen along the way. My least favorite part of Genius Hour research was that most of the days my class had a chance to work on Genius Hour during class happened in the computer lab. The firewall was maddening. Resources such as : YouTube and g mail are not accessible in the computer lab. Any photographs I emailed myself in preparation for my in-class research were useless. The first day we started Genius Hour I realized that websites that have online radios were also blocked. Websites with pictures and instructions to projects are great, but videos on YouTube were more helpful when I was trying to learn something new for my topic.

5. What was the most important thing you learned about yourself, how you learn, or research in general as a result of this work?
I quickly learned that I like to create my own product more so than following someone else's directions. I like to problem solve my way through anything that happens while I'm making my own product. I also realized that I like blogging. I'm learning more and more about what I like to write, and that there are people in the world who actually like what I post :D. I also found out that I care more about the quantity of the products I create. I always care about the quality of anything I make, but for some reason this year I have such a strong desire to make a lot of products to present to my class. I know I probably won't have another opportunity to make many art projects during the next 19 days of the school year, so I think I'm in a hurry to take advantage of this opportunity. I also had a problem with doing a variety of paper crafts. My brain tells me I should explore different types of paper crafts, but my heart is usually stuck on one type of paper crafts. If I make an art project based off of a logical decision where my heart is not into it, I will not enjoy making it. I had to get to the point in this process where I felt comfortable making things I loved to do instead of worrying if my class would "approve" of it during my presentation. I actually learned a lot about myself and how I learn through this year's Genius Hour research.

I am mostly a visual learner. If I can see what I'm trying to do and think out loud or hear what to do I am
golden. During Genius Hour research I could not stay quiet to save my life. Thinking out loud helps me think more clearly. The more comfortable I am with thinking out loud the easier it was to research quickly.

I found the Papyrus flower the most interesting through the course of my research. I found it amazing that dried flowers were used to make paper. ( To see more information about the history of paper on a previous blog post Click HERE )


I can't wait to continue posting on my blog! Thank you for everyone's support through my process of my Genius Hour project. I still have some Genius Hour related post that I will publish before I present to my class. This process has been fun, exciting, and very eye opening. I can't wait to continue more Genius Hour projects in the future. 

The Paper Crane


My 17 paper cranes
My newest success was finding out how to make a paper crane. Paper cranes hold a very special place in my heart from a story my mom used to tell me. To this day I still have the children's book that holds that story. My interest in making paper cranes was inspired my The Paper Crane by Molly Bang. ( To watch the video of the of children's story The Paper Crane by Molly Bang Click HERE)


Between first and second period during my school day on Friday I made 17 paper cranes. It took me a few times to actually make a paper crane that looked right. I actually had five attempts of making a paper crane that I just crumpled up because I couldn't get it right.

Making paper cranes are easy after the first few attempts of making them. One of the things I love about them is how small or big they can be depending on the size of paper you make them out of. Paper cranes are also really easy to display. I haven't made any paper crane displays yet, but I am planning on doing some type of display in the near future. 


Failure #3

As I have said before, I don't mind embracing that failures I have during this Genius Hour Process. A while ago I messed up a 3D origami base. I glue each module together, so if I put 26 modules together instead of 25 modules I've already ruined the entire base and I have to start over. The 3D origami base won't be wasted - I'll use it in another art project one day.
What the base should look like
What my base basically looks like

I felt so frustrated when I realized I messed up the base. I think I was awake into the early hour of the morning and my body was giving me signs to go to bed. I actually had three failures involving 3D origami bases, but two of them mysteriously disappeared. When I look for instructions I understand what I'm supposed to do, but my mind starts wandering and next thing I know I can't connect to rows of modules.

It's always disappointing when I see a picture of how a 3D origami base should be and then I realize my failure has one module too many so the whole thing is ruined.

Tuesday, April 28, 2015

Bird Cage


These bird cages looked so cute that I knew I had to try making them. Since building this paper bird cage had more steps and materials compared to the other projects I've posted I took more pictures this time.


Materials
  • Hot glue, liquid glue, or tape
  • Scissors
  • Ruler
  • Pencil
  • X-acto knife
  • Yarn or thread
  • Circular lid 
  • Hole puncher 
  • Cardboard 
  • Colorful scrapbook paper
TIPS : If you have small brads, card stock, or a small hole puncher the project is easier to complete.


Step 1:
Cut 12" x 1/4" strips of any color paper of your choice. Once cut, fold the strips in half and hole punch the crease. These will be the bars of your bird cage later.


Step 2:
Trace a circular object and cut it out, this will be the base of your cage.


Step 3:
Cut a 12" x 1" strip of any colored paper of your choosing.


Step 4:
Attach the 12" x 1" strip to the circle (the bottom/base of the cage) with hot glue or tape. Fold 1/4" the 12" x 1" strip of paper. On the 1/4" section of the strip make small short cuts with your scissors so you can attach it to the circle. The pictures above clarify how I accomplished this.


Step 5:
It's time to cut out your bird! I drew my own and cut it out with an X-acto knife and cut the bird out on cardboard. If you don't want to draw your own bird Click HERE to download your bird template. Then, make a small hole in the bird's back.


Step 6:

Thread a piece of string through the holes in your 12" x 1/4" strips of paper. Thread the string and knot it in the hole you previously made in the bird. I used thread, so it is harder to see the bird is attached to a string.
                                

Step 7:
Hot glue, tape, or glue the 12" x 1/4" strips to the inside of the base of the cage. The more even the spaces are in between the strips the better the cage will look.


Step 8:
Now that you have the bars of your bird cage set up you can pull up the string to put your bird at any height of your choosing.


Step 9:
Once the bird is at the height that you want you can cut the excess string and hot glue the length of string you want.


Step 10:
You're almost done! Trace a small 1" circle in any color of your choice. Make six equal cuts that are each 1/4" deep into the circle. Once the incisions are made glue the circle to the top of your cage over the collision point of the 12"x 1/4" strips.


This was my final product. Through making this I learned a lot of ways of how to make this better. I made this awhile ago and I can't wait to make something that's more challenging.

Failure #2

I have run into my second failure through the journey of this project. I had the utterly brilliant idea, note my sarcasm, to ignore the convenient link to a template for a bird for my bird cage project. The picture on this post is of the drawings I tried to do while looking at a google image of a hummingbird. the bird was too big and not very proportional. In the end, I ended up drawing the template version of the bird on the website I was looking on.

Although, I am posting things like this so other people can see what problems I run into along the way I also have another reason for posting this. I love art. I love drawing and a lot of times I get to draw are in classes after I've finished my work. When I draw in front of people they ask questions like, "Who are you drawing?" or "What is that?" I don't mind answering questions, but the number one statement I hear is frustrating.I commonly hear people say, "I can't do anything like that." or "I wish I could draw." Not all drawings are good and the picture above is a perfect example.

Not all artsy things look good. I've always believed if you can have even a shred of confidence, try drawing. Don't judge it while you're drawing. Don't think thoughts of how bad it is. Don't block your creativity. Embrace your failures! Learn from those failures! And most importantly have some fun!

Although, I wasn't happy with how my drawing turned out I was happy I even had the opportunity to draw. Whether you think your good at something, or not, enjoy the journey it took you on. Personally, I can't wait for my next adventure in creating something out of paper!

Documenting Goals

Aztec Calendar
created for a Social Studies project in 6th grade
I am a strong believer in documenting my goals. I have a notebook that I carry with me that contains different goals that I hope to one day accomplish. My new goal is to document the next project I start. I have a history of starting projects, that don't have instructions attached to them, and not taking a single photo of the process. The pictures on this post include some of my past projects that I haven't documented, or made instructions for. I'm excited for the next project I have in mind for Genius Hour. Since none of the projects I'm interested in doing have any type of instructions I want to be the first to make step by step instructions of how to make it.


Typewriter
created for a Social Studies project in 6th grade
In the future, I want to start making videos and blog post of instructions of how to make projects I've made in the past. Throughout the week I am going to make sure that I take pictures of the process of making my final product. If anyone is interested in knowing how to make any of the projects in the photographs - for school or otherwise - please leave a comment. If people actually care about knowing how to make models like the ones I've taken a picture of for my portfolio I will start making instructions and videos sooner.


Scroll
created for a Social Studies project in 6th grade

I can't wait until I start on my next project. The newest thing I've learned for this process is that I need to respect the creative process. Creativity involves problem solving, using objects and ideas that don't seem the relative in the slightest, and feeling comfortable to change your mind. I've gone from doing projects to finding the desire to document how I'm making them. Years of just doing art for fun have actually started to turn into something much more.

Saturday, April 25, 2015

Taking a Chance

Everyone has a bad habit and today I've realized that I have a new bad habit. For months I've been looking for ideas and instructions online of how to do paper crafts. I've googled, I've browsed Pinterest, I've watched Youtube videos and I have made some products. Today my mom pointed out something to me that I hadn't noticed about my Genius Hour process this year. 

This year I put myself in a box. I put all of my creativity in a small cramped box. I've followed instructions on how to build objects and I've enjoyed it, but it doesn't give me the spark of happiness that it usually does. I've made different things out of paper before, but Genius Hour is about new learning. After learning about 3D origami I was ready to try making something. I've made a 3D origami panda and I'm happy with it, but I'm not satisfied. 

I want to make something exciting and big. There's nothing wrong with instructions, but my new goal is to make something that I've created without directions. I'll use references to photographs, most likely. I'm not sure what I want to make next, but I'm not going to restrict myself. For the past few weeks I've looked at different pictures of paper craft projects. If a project looked like I wouldn't have time to make it I just ignored it.

I'm going to take a chance and not worry about the length of time my next project will take. I'm excited and I feel that spark in my heart to make something new again. To anyone who is participating in a project or in Genius Hour : Don't be afraid to take a chance. 


Tuesday, April 21, 2015

Types of Origami

I've found out some cool information today.There are different forms of origami! I've found even more possibilities to the art of paper folding.


Krigami

Krigami is a form of paper art that involves folding and cutting. Krigami comes from the Japanese language ("kiru" = to cut, "kami" = paper). Hopefully, I'll find the time to look up instructions to make something in this style.


Candy Wrapper Origami


I've tried doing something like this before,but I never knew there was a name for it. Candy wrapper origami is pretty self explanatory. Candy wrappers can be used to make different objects such as butterflies or flowers. There have even been people who create clothing out of candy wrappers.


Wet Folding Origami


Wet folding origami is a modern form of origami created by Akira Yoshizawa. This involves wetting the paper being used before folding to create a textured effect. This form of origami takes lots of practice but the effect of the technique is worth it.


Action Origami


Action origami is one of the coolest paper craft projects I've heard of. Action origami can be as simple as the 400 year old paper airplane or the cootie catcher (one of my favorites) that tells fortunes. Action origami is the process of folding paper in a way that the final product is able to move in action.


There are many different forms of origami and an endless possibility of creations that can be made. I've made a promise to myself today. I am either going to find time or make time to start, if not finish, a project this week. I am a high school student that can meet a deadline for my homework that's due but can't make a plan to do somjething I love to do and follow through with it. Even if I make something small I am going to give myself time to participate in something that makes me happy. i can't wait to explore the world of origami.


Tuesday, April 14, 2015

A Look Back in Time


The first form of paper was papyrus, a dried and compressed form of sliced sections of the flower stem of the papyrus flower, used for drawing and writing. Papyrus originated in Egypt in 2400 B. C. The creation of paper was in China in 105 A. D. by Ts' ai-Lun from Lei-yank, China

During the fourth century, the Chinese started cutting paper from ornamental purposes and embroidery patterns. Although, paper crafts were originally done by the royal entourage later on paper crafts became a folk art. Paper crafts were also use for practical purposes rather than just aesthetic reasons.

Years pass and the art of paper crafts spreads to the Middle East at the end of the seventh century and the beginning of the eighth century. At the end of the fifteenth century the country of Turkey had a guild created specifically for the purpose of paper crafting.  In the year of 1582 an observer reported seeing a guild member display of a garden entirely made of cut paper flower for the ruler of that time.

During the seventeenth century paper crafts reached European countries, such as : Italy, Germany, Switzerland, and Holland. By the end of the seventeenth century Germany had a popular folk art called Swiss Scherenschnitte, or "scissor cuts". Scherenschnitte is now considered one of the finest paper crafts in the word.


In the 1990s 3D origami became popularized. 300 Illegal Chinese immigrants aboard the ship "The Golden Venture" were caught on their $5,000 paid trip to America. While in prison the immigrants made beautiful paper sculptures using magazine pages and toilet paper. The pieces they created are known as "Freedom Birds". About 30 of the immigrants from the Gold Venture live in the United States today.

Saturday, April 11, 2015

3D Origami Base

After I learned how to make 3D origami modules tought I was ready to start building objects. Through research, I found out that every 3D origami object has a base. Although, the number of modules and number of rows are determined by what object your building, basics of building the base are pretty easy to understand.

The link below is the website I used to learn how to make a 3D origami base.

http://3dorigamiart.com/about-2/

The 3D Origami Panda

I found the picture above while I was searching through pictures on Pinterest. This picture had the most in depth instructions I could find, so I thought it was a good idea for this to be my first 3D origami piece. I thought the panda was super cute. It wouldn't be until much later that I figured out I needed more than 400 modules to complete this piece. Considering I folded construction paper into 16 sections per sheet of paper it took a lot of paper to build this.


The image above are the modules that I counted out to complete the base of the panda. I also made the decision to put glue on each module before putting it together with another module. Although, this was my first time make anything with 3D origami pieces after reading a post on Pinterest about someone accidentally destroying their 3D origami swan while they were moving as a result of not gluing the modules together I decided it might be a good idea to glue the modules together.


The picture to the left is a picture of my upside down base and the beginning of the panda's body. The picture to the right is only two rows away from being the panda's entire body. Fortunately, I didn't have any mistakes that ruined the panda's body. If I glued one module in the wrong pace it would've thrown the entire row off and possibly the row below it.


The picture above is my panda! I worked on the panda five separate days since it takes five hours to complete. The glue combined with how close the modules get to each other has made this panda very sturdy. It is about seven inches tall and I am very proud of how it turned out.


Wednesday, April 8, 2015

Failure #1

The image above is an origami  Koi fish. This origami Koi looked interesting enough for me to attempt to make it. I'm happy to say I watched a four minute video over and over to try to make this. Sadly, with no written instructions the video I watched only became frustrating. This was my first failure for Genius Hour this year. I hope that I will try this again soon to see if I can succeed at making this.

This Koi fish was my first failure and it will certainly not be my last over the next few weeks.I have recently tried a different project that did not end as well as I'd hoped. The beauty in this process is that I know I won't succeed at everything I try, but I can say what I did wrong so someone else can learn from my mistake a do better.

As soon as I try this again I will make sure to post how it goes and what websites or videos I use to accomplish it. I wish they best of luck to anyone who tries to make one of these origami Koi fish. I would love it if anyone who has succeed in making an origami Koi fish would please comment any tips for making one.

Friday, April 3, 2015

3D Origami Modules

I started the preparation for my Genius Hour project about a month ago (I was too excited to wait). Over Christmas Break I spent some time researching different projects that I was interested in. One day, I was looking through Pintrest and I stumbled upon 3D origami. 3D origami involves making small origami pieces called modules that are identical. These modules can fit inside of each other in different patterns to create 3D figures.

I loved the intricate pattern that the modules caused, so I started researching how to make the modules. This video was the first thing I found.

Genius Hour

I am currently participating in a Genius Hour project! My English teacher has graciously granted my grade level six weeks of self-chosen research, or Genius Hour.  I can't wait to start posting information about this four week adventure of research and learning. My leading question for this year is : What aesthetic creations can be made out of paper? 


For anyone that would like more information on Genius Hour click the link below.
http://www.geniushour.com/